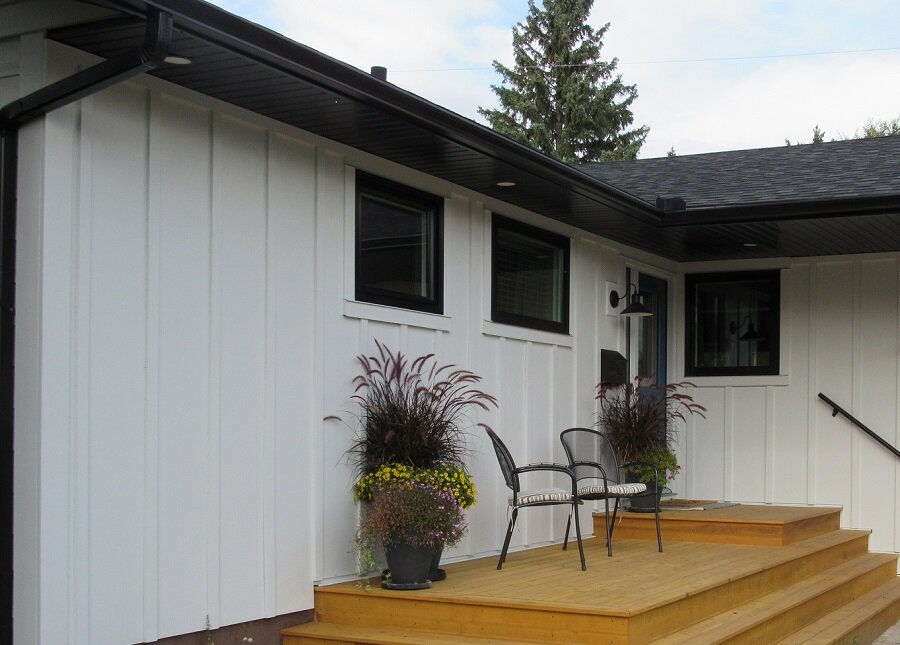
One of the most important factors to consider when designing a James Hardie siding exterior is how you plan on installing it around your windows and other openings. Visually, depending on the design style you are trying to achieve, how you finish around windows can have a massive impact on the aesthetic. Maintenance wise, correct installation around windows is a major factor in the long-term health of your walls.
Here are the most common options for finishing a HardiePlank siding exterior around your openings:
1. HardieTrim Boards
In the Edmonton area, HardieTrim is the most common product used at openings. We like HardieTrim because it’s made of the same Fiber Cement material, so it has the same durability characteristics that we love about HardiePlank siding.
We also love the fact that HardieTrim gives us the option to install with Hardie Tabs, an extruded aluminum backplate that greatly reduces the number of finish nails we have to punch through the face of the trim board. We usually end up spending about $150 to $200 more per house for the tabs, but it’s well worth the cost and effort.
The biggest downside with HardieTrim is the design flexibility. In Alberta, James Hardie distributors are limited to 6 standard colours for their stocking portfolio. This means that customers are often forced to choose a contrasting colour for their trim around windows and doors. Contrasting window trim colours will stand out quite a bit from the base colour of the siding, which can look great on smaller houses or on exteriors without a ton of accenting products. But on an exterior that already features lots of bells and whistles, contrasting trim boards might be one design element too many.
In these cases, we are forced to have our HardieTrims painted at a local paint facility. (James Hardie offers colour matched trims through their Dream Collection paint program, but we hesitate to recommend this route given the decidedly mixed service results the company has had with the launch of that line of products.)
An example of colour-matched corners vs. contrasting ones.
2. Smart Trim (or other engineered wood)
In southern Alberta, the majority of Hardie installers choose Smart Trim by Louisiana Pacific (LP) Building Products. LP Smart Trim has a beautiful, rich wood texture that James Hardie can’t quite match with their Roughsawn textured HardieTrim. Smart Trim is also available in 16-foot lengths, which cuts down on joints and seams in your trim installation.
On the downside, LP Smart Trim doesn’t have any factory painted colours for their products in Alberta. This means that all your trims will have to be painted at a local paint shop, or on sawhorses at the jobsite. Custom painting means higher costs and more variables on the job.
For the most part, we recommend that a Hardie exterior package should include HardieTrim boards. With that said, LP Smart Trim and James Hardie siding are compatible: if installed correctly, both will be warranted by the manufacturer when used side by side.
3. Direct to window
There’s nothing in the James Hardie installation instructions that requires any trim at all for installation around windows and doors. As long as the window frame projects at least 1-inch beyond the sheathing, it’s possible to install your Hardie siding right to the window frame leaving 1/8” clearance from the sides and sill and applying a bead of approved colour matched caulking. There should be at least 1/4” of clearance from a properly installed drip cap flashing above the window as well, and this gap should never be caulked.
The main reason that a homebuilder or installer would caulk Hardie siding right to a window opening is cost savings, usually for windows on the sides and rear of the house. Some designers like the idea of lower profile openings using the direct caulk method, but in practice the result almost never looks as good as intended.
Another downside to installing directly to the window frame is that future window maintenance or replacement could be more complicated. If a window needs to be replaced, such as with a cracked frame, it may require removal of quite a bit of the Hardie on all sides of the windows. If you’ve installed trim boards around the windows, removal and replacement is typically quite a bit simpler.
4. J-Trim
A good option to reduce the visual impact of the openings while still providing a predictable and aesthetically pleasing finish is a metal J-shaped pocket trim. The siding is tucked into the J-trim, leaving the same 1/8” clearance to the inside edge of the trim.
James Hardie requires that all cut edges must be sealed with paint, primer, or caulking, even if the siding is protected by a J-trim. Simply paint your edges as you go, and you won’t need to use caulking on the siding at all, which saves a bit of money while also reducing the future maintenance on your HardiePlank exterior.
HardiePlank lap siding with aluminum J-trim around window
Bonus: Correct flashing procedures
No matter how you decide to install Hardie siding around your windows and doors, make sure that your openings are flashed correctly, not just according to James Hardie’s installation instructions, but to your local building code. James Hardie Building Products does allow you to add more flashing above and beyond what they require without negatively impacting your Hardie warranties.
Different jurisdictions across Alberta have different interpretations of the building code. As a best practice, we recommend reaching out to your local inspector or hiring a contractor with experience in your area. A good rule to remember is that an installation is far more likely to fail an inspection for missing flashing than for including too much.
Summary
Thanks for reading our primer on the different ways to install Hardie siding around windows! If you’d like to see more examples of different installation methods, check out our project gallery, featuring dozens of installations of all types.


