
10 Most Common Install Errors with James Hardie Siding
James Hardie siding is a beautiful exterior product that can last longer than 30 years in Edmonton’s harsh climate. However, to ensure that the product lasts as long as it should and looks great throughout its lifespan, it’s important that your siding contractor follows the installation instructions.
During our careers at James Hardie Canada, it was frustrating to see contractors make the same mistakes over and over again. We found that most of the common problems with James Hardie siding came down to the same thing: installer error.
Here are the 10 most common mistakes Edmonton siding contractors make when installing James Hardie fiber cement siding and trim, the problems they can cause, and how to make sure they don’t happen on your home!
1. Ugly Touch-Ups
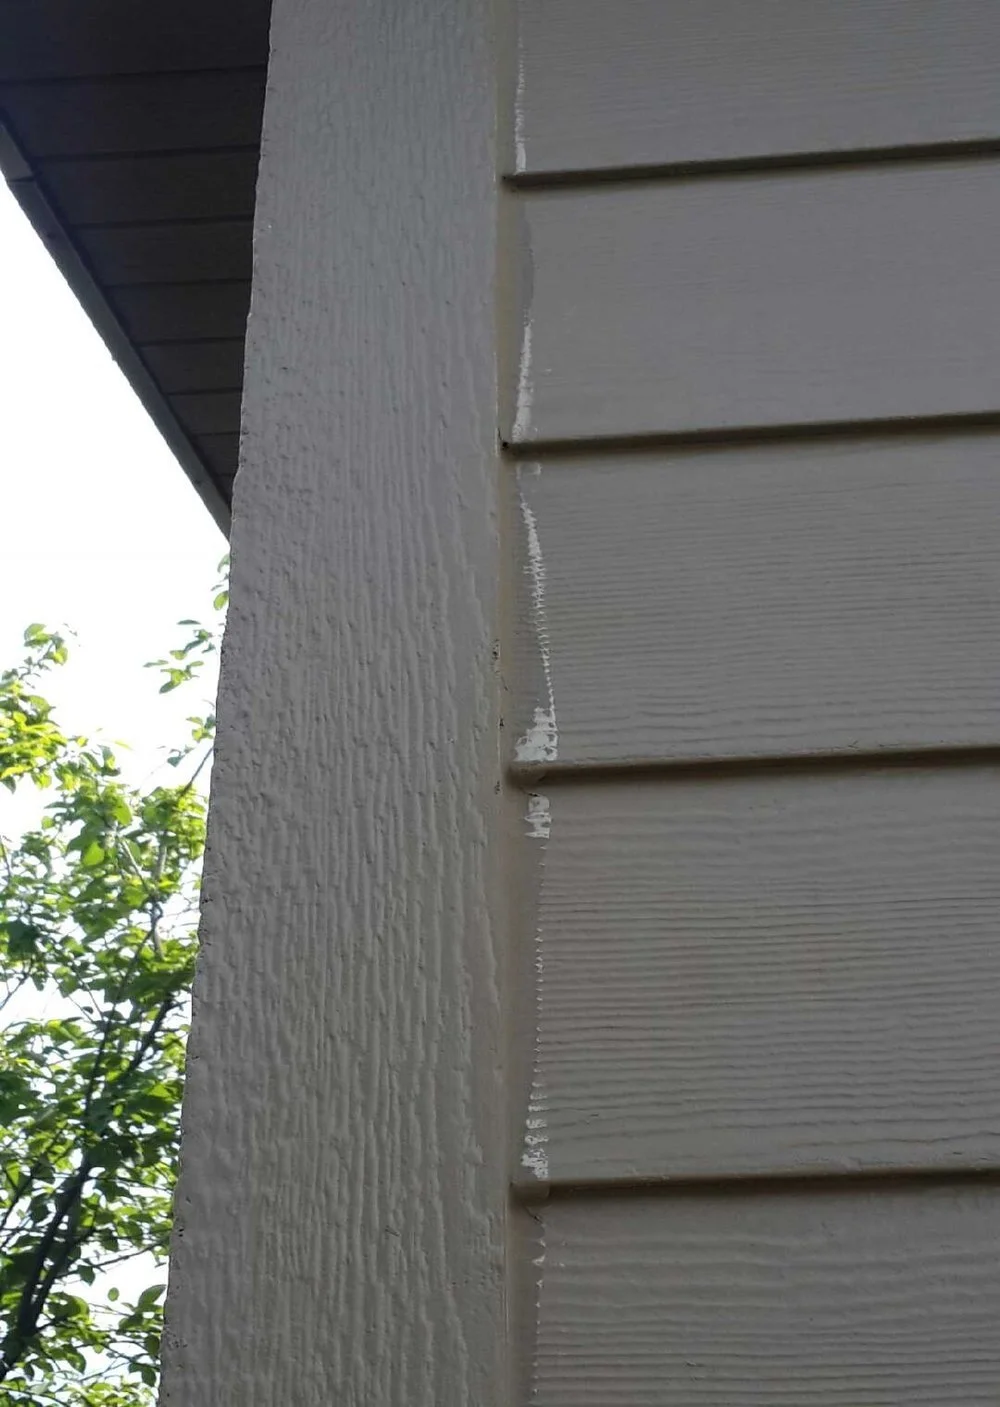
Touch-up mistakes are by far the most common error that Edmonton’s James Hardie installers make. Because James Hardie paints and cures its siding in its factories, the sheen of the touch-up that it sends out doesn’t quite match up. This means that contractors need to be careful to apply just the right amount of paint when painting nails or slight imperfections in the siding and trim.
If a contractor uses too much paint on your home, the touch-ups will end up fading faster than the factory paint on your Hardie board. Eventually your siding may look like it has “chicken pox”: splotches of faded touch-up paint.
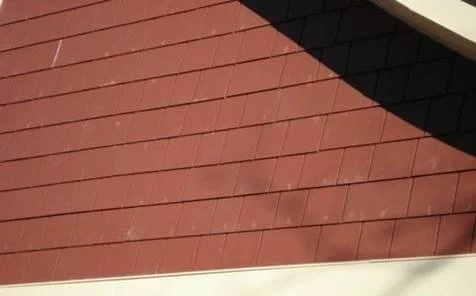
Unfortunately, the only way to fix bad touch-ups on Hardie siding is to repaint the entire affected wall or section. So how do you tell if your contractor is using too much touch-up before it starts to fade? The easiest way to tell is to look at your house from multiple angles and in different light conditions. If you see 1” to 2” circular shiny spots, your contractor may not have done their touch-ups correctly.
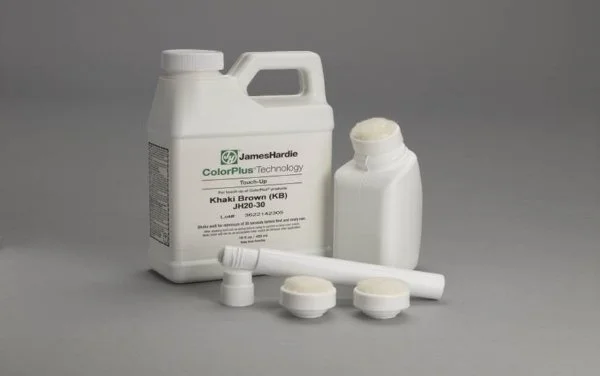
Another easy way to tell if your siding contractor is doing their touch-ups properly is to watch them work. James Hardie’s touch-up kit includes an edge coater (looks like a bingo dabber) and a nail head concealer (looks like a smaller bingo dabber). Make sure your contractor is using the right tool for the job.
Lastly, James Hardie does not allow the use of colour matched caulking for touch-ups. It will look okay on day one, but caulk is not designed to be used as a touch-up and it will weather at a different pace than the siding.
2. Storage
There really is no excuse for siding installers to store Hardie products incorrectly: storage instructions are printed right on the bag, and we all know the weather here can change very quickly! James Hardie’s storage instructions are pretty simple:
· Store Hardie products indoors or under a waterproof cover (the packaging is not waterproof)
· Store Hardie products on a pallet, ideally on level ground (this keeps your siding away from ground moisture)
That’s pretty much it! Simple, right? Well, many Edmonton siding contractors forget to cover their Hardie with tarps when they pack up for the night.
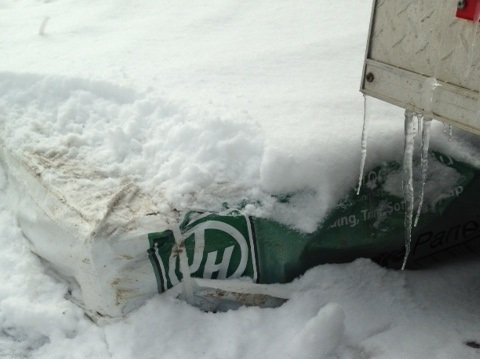
Let’s just say this is NOT the right way to store Hardie Siding
Hardie siding does a great job of wicking moisture when it is installed on the wall, but when it’s uncovered and flat on the ground it will absorb water. If your contractor installs Hardie siding when it’s saturated, it may show signs of shrinkage or even staining over time.
Luckily, it takes lots of water to saturate Hardie products! It’s no problem for a contractor to install James Hardie products in light rain. And if a board does get wet, but is not sitting in moisture for an extended period of time, you can simply let it dry out before installing.
RELATED: Does James Hardie siding fade?
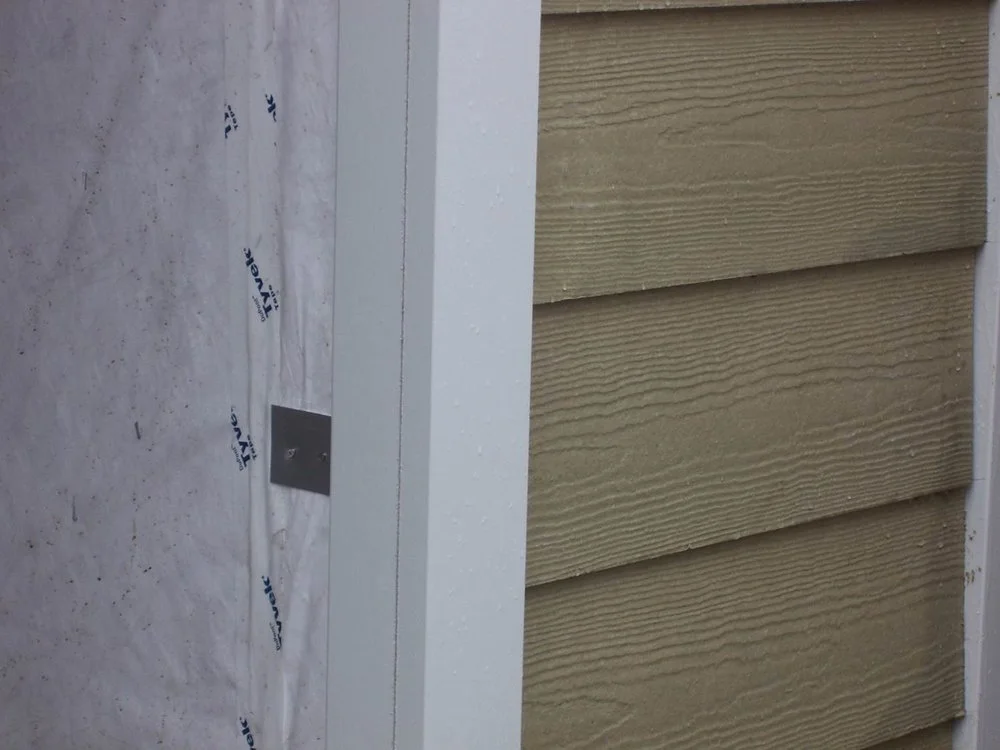
3. Hardie Plank Joints (Butt Joints)
James Hardie siding is 12 feet long, which means that siding on your longer walls will need to join together. Joining Hardie boards together is actually very easy, but there are a number of ways that contractors get it wrong;
· Gaps: Hardie boards should be joined in “moderate contact”. This means that the boards should be touching each other when they are installed. There is no need to leave a gap for expansion.
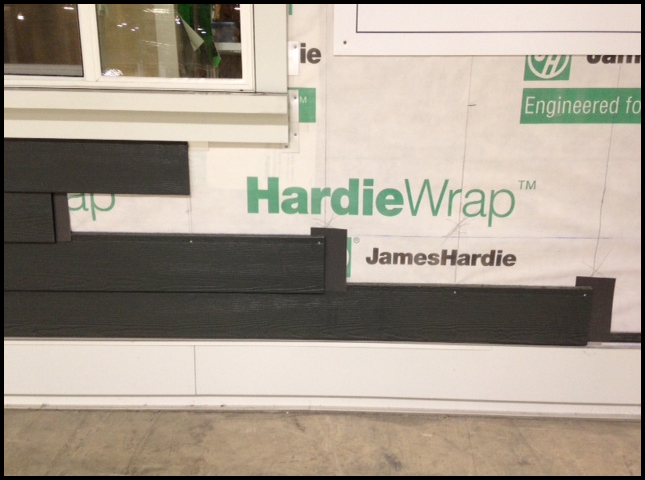
· Joint flashing: James Hardie recommends that a slip sheet (joint flashing) is installed behind each butt joint in the siding. This is a 6” wide piece of weather resistive material to make sure that no water gets through. Most contractors will remember to do this, but some of them try to save a buck by cutting squares of building paper for these slip sheets. This is allowed under James Hardie’s warranty, but because most building paper is white it shows very clearly through the joints in the siding. Colour matched metal slip sheets are a much more durable and better-looking option.
· Joint placement: James Hardie states that all joints must land on a stud, unless you have minimum 7/16” wood structural paneling as sheathing. This means that the butt joints may develop a pattern if the installer is not paying attention. Clusters, steps, and zippers are all common patterns that can ruin the look of larger walls.
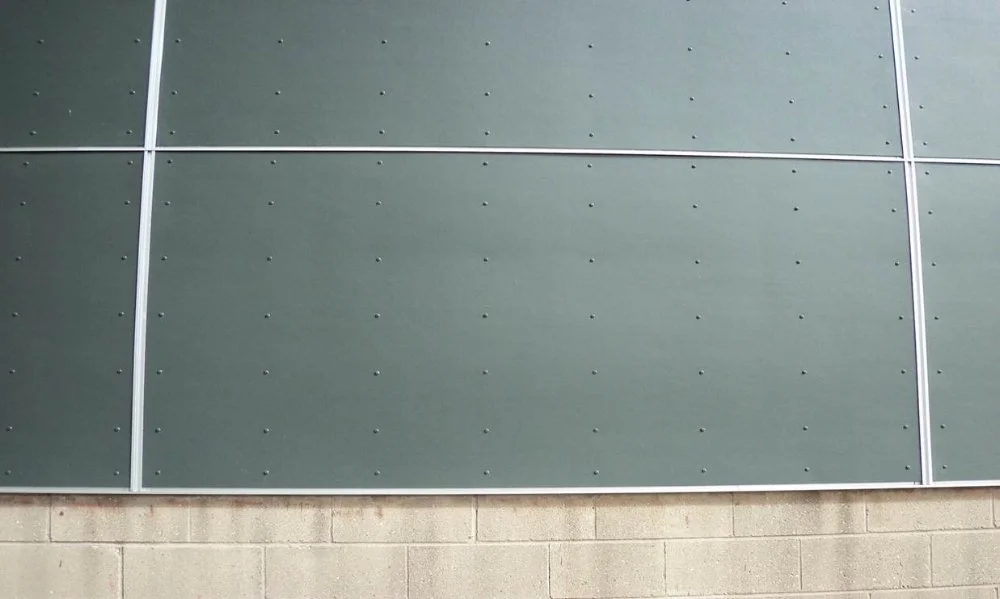
4. Not Enough Fasteners
With the rising popularity of architectural panels in Edmonton, designers and contractors are often choosing Hardie Panel with Easy Trim as a modern design option that saves homeowners money (check out our blog post on contemporary design to learn more about Hardie Panel and Easy Trim).
Unfortunately, some contractors don’t realize that Hardie Panels need to be fastened to the studs in a consistent pattern, with full headed screws or nails.
Hardie Panels weigh 2.3 pounds per square foot and are only 5/16” thick. This means that they are very flexible for their weight and when wind pushes on them they can flex slightly if they aren’t secure. James Hardie has tested and approved many nail and screw patterns for their panels, just make sure that your contractor knows them.
RELATED: Can You Install Hardie Siding Over Existing Stucco?
5. High Nailing
Hardie Plank siding is almost always installed with air nailers, which are the best tool for quick installation. The only downside of pneumatic tools is that sometimes the installer will get going a little bit too quickly, and will lose track of where the nails are going.
Hardie Plank siding has a nail line across the top of the board that is 1” down from the top, and nails are supposed to fall between ¾” and 1” from the top of the board to give the best hold. Any lower and you might see a few nail heads poking through the bottom of the next board, any higher and your siding is likely to be loose and could even rattle in the wind.
High nails are very common from inexperienced James Hardie installers, because they think the nails can go anywhere above the nail line. If you can easily fit your hand underneath your Hardie siding, 9 times out of 10 that’s because the installer didn’t nail the boards properly.
6. Clearances
Most of the James Hardie installation requirements in Canada are designed to deal with excess moisture. Because we get so much snow and ice in Edmonton, these requirements are very important. Hardie siding requires a minimum 2” gap from all hard surfaces like decks or rooflines, and at least 8” from any soft surfaces like grass, dirt, or gravel.
During my time working for James Hardie, I very rarely got calls from homeowners that wanted to submit a warranty claim for their Hardie siding. The majority of the claims that I did see were from people who had their siding installed so it was touching the driveway, or sometimes right down into the dirt of their flower beds! James Hardie siding is made of cement, so it will absorb moisture if it is installed like this.
If Hardie is installed too close to these surfaces, there is a chance that the paint will start to bubble and peel. This happens because the boards are wet almost all the time, and the water in the board will start to expand and contract as the temperature changes.
If you decide you don’t like the look of the 8” clearance from your soft surfaces, that’s okay! James Hardie’s warranty is in effect for each individual piece, which means that if you decide to ignore the installation instructions for a few Hardie boards, you still have a full warranty on the rest of the pieces that are installed correctly.

So, go ahead and install your Hardie wherever you like! Just keep in mind that you may be replacing some of the boards in the first row much sooner than you thought.
7. Ugly Caulking
Wherever Hardie siding meets a trim board, the company recommends you leave a 1/8” gap between the siding and the trim and apply a 3/8” bead of approved caulking to protect and seal the edge of the siding. Because almost all of the James Hardie product installed in Edmonton is prefinished ColorPlus siding, the caulking will be available in all of James Hardie’s colours. Always remember to match the caulking to the colour of the siding, never to the colour of the trim.
For years Quad caulking by Lepage has been the standard Hardie caulking in the Edmonton market. Quad caulking is UV resistant and flexible, and when it cures it shrinks about 30%. This means that Hardie contractors are used to overapplying their caulking and letting it shrink over time.
2015, Lepage introduced Quad Max which can be applied in wet and freezing conditions, but hardly shrinks at all. Many contractors still haven’t adjusted their caulking style, and sometimes you will see some very large and unsightly beads.
Experienced Hardie board installers know that messy caulking is the easiest and fastest way to ruin a perfectly good exterior.
RELATED: Check Out This Crappy Project Estimate
8. Cut Dust
By now you probably know that Hardie siding is made of fiber cement, which requires installers to take care when cutting to make sure that they don’t breathe in small sand (silica) particles. Continued exposure to these particles can lead to severe long-term health issues for workers if it isn’t managed correctly. Once the Hardie siding is installed, there is no health risk for the homeowners from silica.
The other issue with James Hardie dust is that it sticks to ColorPlus paint. James Hardie developed ColorPlus paint so that it sticks very well to fiber cement. That means that if installers don’t wipe dust off the Hardie right away, the dust can settle and start to stick to the paint. The longer the dust sits on the board, the tougher it is to remove.
Luckily, this issue is pretty easy to solve. Contractors should make sure that their cut station is outfitted with a clean cloth so the cutter can wipe the dust off right away. Another option is to suggest that the contractor use a dust free fiber cement tool, like a shear or a guillotine.
Reducing cut dust is good for the health of the workers as well as the look of your home!
9. Don’t Forget To Use the Right Corrosion Resistant Fasteners!
Almost all nails and screws have some kind of rust-resistant coating, but they are not all created equal. Hardie board comes with a 30-year manufacturer’s warranty, but that means you need the nails to last at least that long too. James Hardie recommends that nails be hot dip galvanized (at a minimum) or stainless steel (as a best practice). Anything less and the nails may start to rust, leading to stains on your beautiful siding. Even worse, siding could start falling off!
When your installers are getting started, make sure you take a look and confirm that the nails they are using are stainless steel or at least hot dip galvanized, not electro-galvanized. It should say right on the box.
RELATED: 5 Ways Other James Hardie Contractors Cut Corners
10. Face Nailing Smooth Trim
This one isn’t a mistake so much as a pet peeve of mine, but it still can make a big difference in the look of your home.
Most of the Hardie Trim installed across Canada is flat and smooth, and installed with finish nails. If the installers do a perfect job of driving the nails flush and touching up, Hardie Trim with finish nails looks fantastic.
In practice, this is very difficult for installers to do. Hardie Trim has grooves on the backside to give it more strength when workers are carrying it. This means that in some places on the board, the nail has about 20% less material to get through. This can lead to the finish nails sinking into the board.
When the nails countersink, it leaves a hole that the installer either has to fill or paint. Since every full Hardie Trim board should have at least 18 finish nails, you can expect between 5 and 10 nails per trim to countersink and leave a mark.
To solve this issue, James Hardie came up with a hidden fastening system for their trims. Installers can staple aluminum tabs to the back of the trims and then nail the tab to the wood sheathing on the wall. They will still need to use the odd face nail to make sure everything sits tight, especially around windows, but Hardie’s trim tab system can eliminate about 90% of all face nailing on a normal house.
There are a few reasons why a contractor shouldn’t use tabs. For example, if you are planning to replace your windows a few years after replacing your siding, tabs will make the trims much tougher to remove. For most people though, trim tabs give a more predictable result with smooth trim.
Thanks for reading! If you are interested in learning more about Hardie installation, give me a call or text and I will be happy to help.
If you’d like to check out some of the beautiful James Hardie exteriors that we’ve completed for happy customers, there are dozens of recent projects with detailed descriptions in our gallery.
If you’re interested in talking to us about a new James Hardie exterior for your home, please use the contact form to reach out to us!